There is no shortage of adhesives available for a home improvement project. However, choosing the right for your needs is overwhelming. That’s because you need to consider several factors to attain the best results. And, when it comes to installing tile, following a specific process can make the tiles stay put.
So, what is the best adhesive for tile backsplash? In general, most people use three types of adhesive: tile mastic, thinset mortar, and epoxy mortar. Read on to find more about them including pros and cons and how to install them.
Table of Contents
1. Tile mastic
To begin with, mastic is an outdated term that typically refers to glues used for tile. Mastic was an organic resin derived from plants and has gummy, sticky properties. However, the term isn’t used frequently these days. Also, it is hard to find tile adhesives that go by the name rather than a few exceptions.
Composed of calcium carbonate and acrylic copolymers, tile mastic is considered an alternative tile adhesive that can dry out in around 24 hours. Commonly called ceramic tile adhesive, tile mastic isn’t for surfaces with high moisture. However, vertical projects look easier because of the sticky properties.
That way, it produces the right adhesion in places where the tile might have slid otherwise. Tile mastic is great for bonding ceramic, glass, or porcelain. However, it shouldn’t be used to fill the gaps because it has rich water consistency. Besides, it is best used for tiles with 8-inches or smaller.
Pros
- You can save the unused mastic
- Because tile mastic sticks well, tile sag during curing gets minimized when working on vertical surfaces
- Tile mastic makes the job easy when removing tile
Cons
- Tile mastic has an odor
- It can’t be used on areas that have high moisture
- Fixing poorly aligned tiles are hard because of the quick-grab feature of tie mastic
How to install
- Clean the walls so that it is free from any dirt or debris. If necessary, scrape or sand away to create a flat surface
- Use a level for arranging the tile, marking, and aligning them horizontally in respect to the countertop
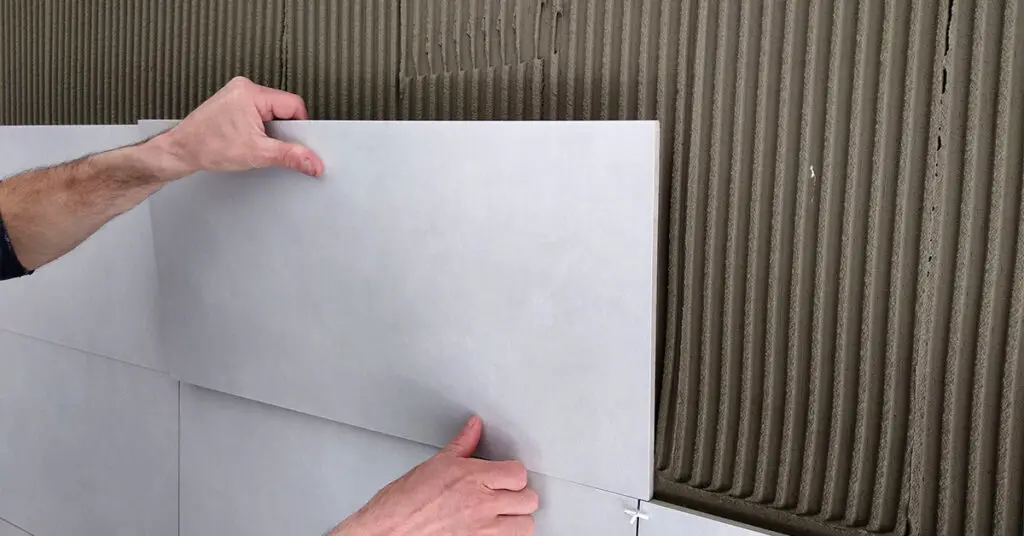
- Apply mastic to the back of the tiles and position them on the wall. Work out from the center and take care so that the tile maintains the right level. You may use grout spacers so that the tiles stay apart
- Wipe away excessive adhesive using a damp cloth. Depending on the humidity and temperature the adhesive will dry in about 12 hours
2. Thinset mortar
It is the most commonly used adhesive used to bond tile to cement backer board or cement board. Thinset mortar is made of cement, sand, and sometimes water-retaining compounds such as polymer or latex. Thinset bonds the tile to the surface. Besides, it is heatproof, mold-resistant, and moisture-resistant.
Thinset mortar is available in both pre-mixed and standard form, modified or unmodified. Also, it has a dry time of anywhere between 24 and 72 hours. And, it depends on the specific type of thinset mortar you used for the project. Thinset mortar is mined from the earth and is inexpensive.
Moreover, it can be purchased in powdery, dry or pre-mixed, and wet form. Most of the unmodified thinset mortar is composed of water retention agents, sand, and Portland cement. Modified thinset, on the other hand, has the same elements alongside liquid latex polymers that increase the working time and help with strength.
Pros
- Dry thinset is an inexpensive alternative and easy to use
- Thinset mortar is a stronger material compared to tile mastic. And, it is a good choice for horizontal applications such as flooring that attracts a lot of pounding
Cons
- When it comes to demolition, thinset mortar requires much effort to remove
- Also, it takes a considerable amount of time to dry. The vertically installed tile might droop during the curing procedure
- Excessive thinset can’t be saved and has to be thrown out
How to install
- Mix the thinset thoroughly with water until it holds the shape and isn’t pourable
- Gently spread the thinset onto the surface
- Comb the mixture to create an even surface. You can use a trowel for best results
- Lay the tile carefully and wipe away the excess mixture with a damp sponge or cloth
3. Epoxy mortar
It comprises two or three separate components that should be mixed before usage. Besides, epoxy mortar is another popular adhesive that sets within one to two hours of application. However, epoxy mortar is more expensive compared to the other types of adhesives.
And, that includes almost everything such as stone, metal, ceramic, metal, porcelain, and even glass. When it is about properly setting the adhesive, epoxy mortar needs a temperature of about 60 to 90 degrees. Also, it starts around 45 minutes after applying the adhesive. Apart from that, the durability of this adhesive is unmatched compared to others. Besides, it resists compression and movement with traffic.
In short, epoxy mortar creates a tough seal. That way, the tiles remain in place for a long time. The main ingredients in this adhesive are epoxy resins and a kind of filler material. The materials chemically react with each other and form the mortar.
Pros
- Epoxy mortar is non-porous and doesn’t encourage the growth of mildew or mold. As such, epoxy mortar is the preferred choice when it comes to areas such as kitchens and bathrooms. These areas are likely to be damaged by water
- Epoxy mortar is a very strong, chemically resistant, and durable material that lasts for a long time
- Because the epoxy mortar is stain-resistant, it is easy to maintain without fuss. The best part is that you can clean the dust and grime with a wet sponge or damp cloth
Cons
- Working with epoxy mortar is complicated
- It is very quick-drying, so get prepared to avoid wastage
- Cost of material and installation is expensive
How to install
- Keep the tools ready and mix the mortar well
- Spread the mix with a trowel to fill the joints
- Immediately use a damp cloth or wet sponge to wipe the excessive mixture
- After applying, make sure to clean the tile properly. Use water and vinegar to remove mortar from the tiles